


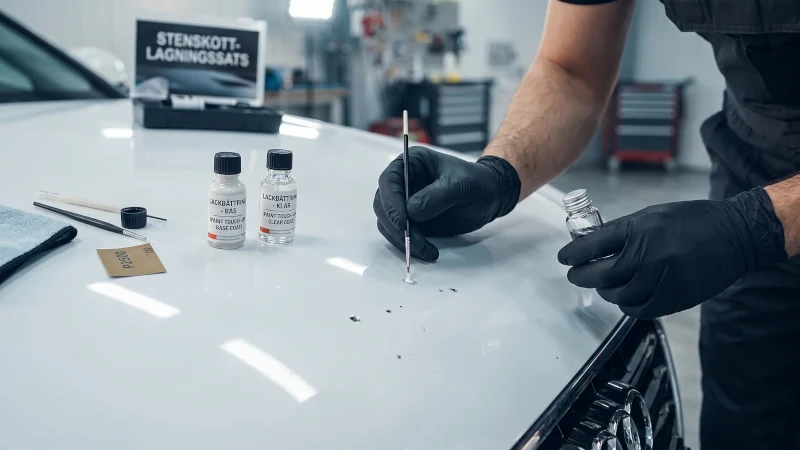
During daily use, your car's paint is exposed not only to various types of dirt but also to mechanical damage – stone chips and deeper scratches. These damages negatively affect the car's appearance and can lead to rust formation. It's therefore important to quickly protect the damage with both base coat and clear coat. In this guide, we walk through step-by-step how to do a paint touch-up the right way.
Key Points
- Quick action prevents rust – cover the damage as soon as possible
- Right color code is critical – usually found in the door jamb or under the fuel cap
- Three layers needed – rust protection, base coat, and clear coat
- P3000 sandpaper is the standard choice for fine sanding
- Polishing at the end gives a professional final result
What is a Paint Touch-Up?
A paint touch-up is a repair technique where you fill small paint damages with base coat and clear coat to mask the defect and protect against corrosion. The technique is mainly used on stone chips, minor scratches, and small paint losses.
It's important to understand that a paint touch-up will never become completely invisible – it covers the damage but will always differ slightly from the factory paint. The purpose is partly cosmetic, partly to protect the metal underneath from moisture and rust.
What You Need for a Paint Touch-Up
Before you start, you need to have the right equipment ready. Stopping mid-work to fetch materials can ruin the result since several steps require previous layers to dry undisturbed.
Basic Products
- Rust remover or rust neutralizer
- Base coat in the right color code
- Clear coat
- Isopropanol (IPA) for degreasing
- P3000 sandpaper – for fine sanding
For Polishing
- Polishing machine (rotary or dual-action)
- Polishing pads in different hardness
- Polishing compounds with different abrasiveness
Sanding Products (Recommended)
- KOVAX Tolecut – self-adhesive sanding discs in various grades (K1500-K3000)
- KOVAX Buflex – velcro sanding discs 75mm
- KOVAX Assilex – velcro sanding discs K800/K1200
- Cartec Abrasives Foam Disc – foam discs 75mm in various grades
Important about color code: It's crucial to choose the right paint color. The color code is usually found in the door jamb or under the fuel cap. In some cases, you need to decode the color code from the car's VIN number. Keep in mind that the touch-up will always differ slightly from the factory paint – minor color differences are normal.
Paint Touch-Up Step-by-Step
The whole process takes a few hours including drying times. Plan for a full day if you want the best results.
Step 1: Prepare the Surface
Start by removing loose rust and rounding off the sharp edges around the damage with P3000 sandpaper. This creates a smoother transition and better adhesion for the paint.
Once the rust is gone, apply a thin layer of rust remover and let the surface dry according to the manufacturer's instructions. This step is important to prevent rust from developing under the new paint.
Step 2: Apply the Base Coat
Fill the damage with the base coat using the included brush or a Fluid Pen. Apply 2-3 layers with about 15-20 minutes between each layer.
- In colder weather: wait 30 minutes between layers
- Then let the surface dry completely
- Carefully sand off excess base coat with P3000 sandpaper
- Degrease the surface with isopropanol (IPA)
Step 3: Apply Clear Coat
The next step is to apply the clear coat. Use the included brush or Fluid Pen and apply 3-5 layers with 15-20 minutes between each (30 minutes in cold conditions). Then let the surface dry completely.
How to sand the clear coat:
- Protect the area around the damage with packing tape
- Sand down excess clear coat with P3000 sandpaper
- Leave a slight bump – this makes the touch-up less visible
Step 4: Polish to Finish
The final step is to polish away the dullness from the sandpaper to bring back the shine and assess the final result.
We recommend using a hard foam pad together with an aggressive polishing compound like CarPro Ultracut, which is available in our range.
Pro Tip: Polish in multiple stages – start with an aggressive compound and finish with a finer one for the best shine. Work in smaller sections and keep the polishing machine moving to avoid overheating the paint.
Frequently Asked Questions About Paint Touch-Ups
How long does a paint touch-up take?
Plan for 4-6 hours for a single damage, plus drying times between layers. If you want to do it really well, you should set aside a full day or split the work over two days.
Can I do a paint touch-up outdoors?
It's possible, but the result is better in a dry, dust-free space with temperatures around 18-22°C. In colder temperatures, each layer takes longer to dry.
How do I find the color code on my car?
The color code is usually on a label in the door jamb (driver's side) or under the hood. On some cars, it's under the fuel cap. If you can't find it, contact your dealer with the VIN number.
Will the touch-up be visible?
Yes, it will always differ slightly from the factory paint upon close inspection. However, it will be much less visible than the original damage, and most importantly, it protects the metal from rust.
Do I really need clear coat?
Yes. The clear coat protects the base coat from UV radiation and provides the shine. Without clear coat, the base coat will fade and look matte after a while.
What do I do if the damage is bigger than a stone chip?
Larger damages (more than 5-10 mm in diameter) or deeper damages that have gone through the metal are harder to fix yourself. For these, we recommend contacting a paint specialist for the best result.
Summary
A paint touch-up covers mechanical damage to the paint and – most importantly – protects the metal against rust. The final result will never fully match the factory paint, but it significantly improves the car's appearance and prevents more expensive rust damage in the future.
- Quick action prevents rust formation
- Right color code is fundamental for good results
- Follow the steps in order – take no shortcuts
- Polishing at the end makes a big difference for the final impression
- At HQLights, you'll find most of the products you need
Need products for paint touch-up?
See our range of paint touch-up products at HQLights
Or see our selection of sandpaper and polishing compounds.
Last updated: April 25, 2026
Leave a comment