


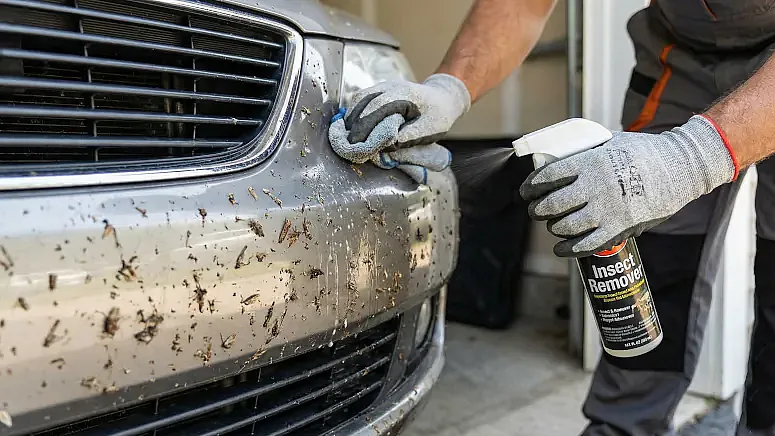
Removing Insects From Your Car – Quickly, Safely and Without Damaging the Paint
Crushed insects on the bonnet, bumper and windscreen are not just unsightly – left in place they can cause discolouration, etching and permanent damage to the clear coat. Insects contain enzymes and acids that break down the paint surface, and the longer they remain the harder they become to remove. The right technique and a dedicated insect remover make the difference between a simple clean and hours of frustration.
This guide shows you how to remove insect residue effectively, where in the wash process to do it, and how to protect the car to make future cleaning easier.
Why are insect remains harmful to car paint?
Insects contain proteins, enzymes and organic acids that react chemically with the clear coat. Heat and UV light accelerate the process. The result can be:
- Etching: The acid eats into the clear coat and leaves visible marks that require polishing to correct.
- Discolouration: Pigments from the insect bodies can leave yellow or brown stains.
- Permanent damage: If the residue remains for weeks – especially during the summer months – the damage can reach the base coat.
The rule of thumb is simple: the sooner you remove insect residue, the lower the risk of damage.
Essential products
- Insect Remover
- Snow Foam (active foam)
- Car shampoo
- Wash mitt
- Microfibre cloth
Step by step: removing insects from your car
Method 1: Heavy insect build-up (summer motorway driving)
When dealing with large amounts of crushed insects – typically after long motorway drives during summer – treat the front before the snow foam pre-wash:
- Rinse the front with water to soak the residue.
- Spray insect remover generously onto the bonnet, bumper, grille, headlamps and lower section of the windscreen.
- Allow 3–5 minutes of dwell time (follow the manufacturer's instructions).
- Rinse off and continue with snow foam as normal.
- If residue remains after the snow foam – apply insect remover once more to the affected areas. Allow a few more minutes of dwell time.
- Proceed to the contact wash with wash mitt and car shampoo.
Method 2: Light insect residue (regular washing)
For smaller amounts of insects, it is often sufficient to spray insect remover on the affected areas during the pre-wash stage and then wash as normal using the two-bucket method.
Prevention – make future cleaning easier
The right protection ensures insects come off more easily at the next wash:
- Paint protection: A surface treated with wax, sealant or ceramic coating prevents insect residue from bonding as firmly to the paint. They come off more easily during washing and the risk of etching is reduced.
- Plastic trim: Unpainted plastic trim on bumpers and grilles has a porous surface that insects stick to. Treat them with trim dressing or a dedicated plastic coating to create a smoother, dirt-repellent surface.
- Windscreen: A hydrophobic windscreen treatment (glass coating) causes insects and water to sheet off more quickly. It improves visibility in rain and makes windscreen cleaning considerably easier.
Suitable for: Car owners, car enthusiasts, professional detailers, reconditioning technicians and fleet managers wanting to avoid paint damage from insects.
Industries: Vehicle care, car reconditioning, detailing studios, car dealerships, car hire and fleet management.
Frequently Asked Questions About Removing Insects From Car Paint (FAQ)
Can insect residue cause permanent damage to car paint?
Yes, insects contain enzymes and organic acids that break down the clear coat. Heat and UV light accelerate the process. Residue left for more than a few days can cause etching and discolouration that requires polishing to correct. With prolonged exposure – especially during summer months – the damage can reach the base coat and become permanent. The rule of thumb is to remove insect residue as soon as possible, ideally within 24–48 hours.
Should insect remover be applied before or after snow foam?
For heavy insect build-up, apply insect remover before snow foam to pre-treat the worst contamination. Spray the product on the front, allow 3–5 minutes of dwell time and rinse off. Then continue with snow foam as normal. For lighter residue, you can spray insect remover at the same time as the pre-wash. Always apply to cool paint and never allow the product to dry on the surface.
How can you protect the car against insect residue during summer?
Three levels of protection reduce the problem: 1) Treat the paint with wax, sealant or ceramic coating – insects bond less firmly to a protected surface. 2) Treat unpainted plastic trim with trim dressing or plastic coating. 3) Apply a hydrophobic windscreen treatment (glass coating) so that insects and water sheet off more quickly. During periods of heavy insect activity, keeping a bottle of insect remover in the car saves effort – a quick treatment before the residue dries makes a significant difference.
Leave a comment