


Prepare Your Car for Spring – Complete Guide for Paint, Wheels and Interior After Winter
As winter loosens its grip, many car owners focus on tyre changes and air conditioning servicing. Equally important is a thorough treatment of the bodywork after months of road salt, grit, slush and metallic deposits. These contaminants break down the clear coat, cause micro-scratches and accelerate corrosion – especially on wheels, wheel arches and lower body panels. A proper spring treatment is not just about appearance but about protecting the paint and preserving the car's value.
This guide takes you through the entire process step by step: from wheels and wheel arches, through safe washing and decontamination, to paint restoration, protection application and interior care.
Step 1: Wheels and wheel arches – start here
The most contaminated area after winter is the wheels, wheel arches and lower sections of the car. Road salt, brake dust and grit have accumulated here for months. For a thorough spring treatment, it may be worth removing the wheels – this gives access to surfaces that are otherwise difficult to reach.
The cleaning should be carried out in several stages:
- Pre-wash: Remove loose dirt with snow foam or a pre-wash product.
- Wheel arches: Spray APC (all-purpose cleaner) into the wheel arches and scrub with a wheel brush. APC dissolves grease, salt and road film.
- Wheels: Use a wheel cleaner to dissolve brake dust and iron particles. For heavy metallic deposits, supplement with iron fallout remover (deironizer).
- Tar on wheels: Asphalt and tar residue is removed with tar remover.
- Tyres: Scrub the tyres with a tyre brush and APC to remove residue from old tyre dressing and prepare them for a fresh layer of protection.
Step 2: Safe body wash – pre-wash, snow foam and the two-bucket method
After the wheels, it is time for the bodywork. The key to a scratch-free wash is removing as much contamination as possible before the wash mitt touches the paint.
Pre-wash
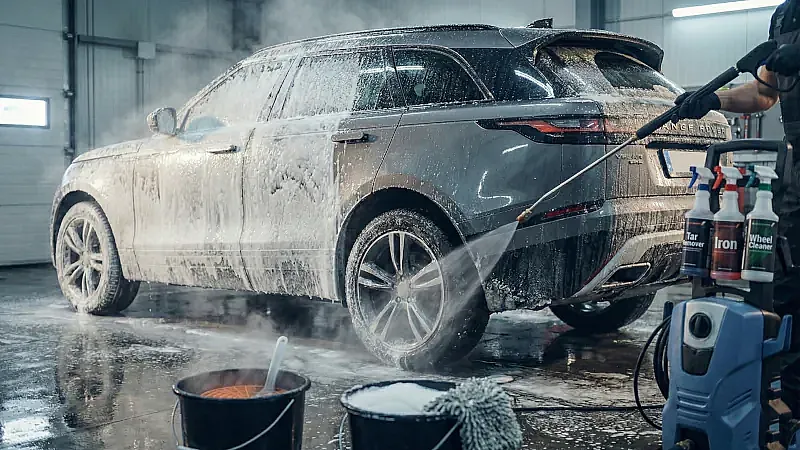
Apply pre-wash to dry, cool paint. Allow a few minutes of dwell time and rinse thoroughly with a pressure washer. The pre-wash dissolves road salt, grit and grease film without contact.
Snow foam
Apply snow foam with a foam lance. The foam softens remaining contamination further. Rinse off after the recommended dwell time.
Contact wash with the two-bucket method
Fill one bucket with water and car shampoo, and one bucket with clean water for rinsing the wash mitt. Use grit guards in both buckets. Start at the top – roof, windows, bonnet – and work downwards. Save the most contaminated areas (sills, bumpers) for last. Rinse off and dry with a drying towel or microfibre cloth.
Step 3: Decontamination – chemical and mechanical
Even after a thorough wash, contaminants remain on the paint that shampoo cannot remove. Tar, asphalt and iron particles bond to the clear coat and can cause corrosion and a dull finish if not addressed.
Chemical decontamination
- Tar remover: Spray tar remover on dry paint. Allow it to react until the tar dissolves and rinse off.
- Iron fallout remover: Spray deironizer on the paint. The product reacts with iron particles and turns purple/red. Rinse thoroughly.
Mechanical decontamination
After chemical treatment, carry out mechanical decontamination with a clay bar or clay mitt and plenty of clay lubricant. Work panel by panel with light pressure and straight strokes. The surface should feel completely smooth as glass afterwards – the paint is then ready for the next step.
Step 4: Paint restoration – cleaner and light correction
Winter leaves not only dirt but also micro-scratches, water marks and light oxidation. Spring is the right time to restore clarity and colour depth to the paint.
- Paint cleaner: Removes residue from old wax layers, light oxidation and improves gloss. Applied by hand or by machine.
- Primer: Creates a strong base for wax, sealant or ceramic coating. Enhances the visual effect and improves adhesion.
- Light correction: For visible micro-scratches and swirl marks, a dual action polisher with a soft polishing pad and polishing compound can restore the clear coat without removing excessive material.
Step 5: Protection application – choose the right option
The conclusion of the entire process is the protective layer that provides a hydrophobic effect, colour depth and easier future washing. The choice depends on desired durability and how the car is used:
- Natural or hybrid wax: Produces a warm gloss and enhances the paint's colour depth. Typically lasts 4–8 weeks. Popular among enthusiasts who appreciate a classic finish.
- Synthetic sealant: More resistant to detergents and provides longer durability – often 3–6 months. Mirror-like gloss.
- Ceramic or quartz-based coating: Provides up to 12 months of protection, strong hydrophobic effect and increased chemical resistance. Best suited for those wanting long-lasting protection with minimal maintenance.
Step 6: Details that make the difference
A complete spring treatment also includes surfaces that are often overlooked:
- Plastic trim: Unpainted plastic trim on bumpers, wing mirrors and sills fades during winter. Treat with trim dressing to restore colour and protect against UV.
- Glass: Clean the glass of mineral deposits with glass cleaner and apply a hydrophobic windscreen treatment (glass coating). This improves visibility in rain and makes it easier to remove insects during summer.
- Rubber seals and trim: Treat door seals and window seals with a rubber seal conditioner to prevent drying, cracking and loss of elasticity.
Step 7: Interior care – do not forget the inside
Spring is the right time for a thorough interior treatment after winter's moisture, dirt and salt:
- Vacuuming: Vacuum floors, seats, crevices and the boot thoroughly.
- Plastic panels: Clean and protect with an interior quick detailer with anti-static properties.
- Leather upholstery: Clean with leather cleaner and moisturise with leather conditioner.
- Fabric upholstery: Use fabric cleaner and a brush for stains. Consider a fabric protector to guard against future stains.
Common mistakes during spring car care
Avoid these common errors that reduce the overall result:
- Skipping the pre-wash: Going straight to the contact wash without pre-wash and snow foam drags grit and salt across the paint, causing micro-scratches.
- Applying chemicals in sunlight or on hot paint: Products dry too quickly and leave streaks and marks that are difficult to remove.
- Skipping decontamination before protection: Wax or sealant applied to contaminated paint bonds poorly and lasts a shorter time.
- Using the same wash mitt without rinsing: Grit accumulates in the mitt and causes scratches. Use the two-bucket method and rinse the mitt after every panel.
- Applying too much wax or coating: A thicker layer does not provide better protection – it only makes buffing harder and wastes product.
Regularity makes the difference
A thorough spring treatment gives a strong start to the season, but the protection only lasts if the car is maintained regularly. Even the best ceramic coating loses its effect if the car is not washed with the correct technique.
Plan regular washes using the two-bucket method, and boost the protective layer every 4–6 weeks with quick detailer or spray wax. The result: a car that looks fresh throughout the spring and summer season, is easier to wash and retains its value.
Suitable for: Car owners, car enthusiasts, professional detailers, reconditioning technicians, car dealers and fleet managers wanting to protect the paint after winter.
Industries: Vehicle care, car reconditioning, detailing studios, car dealerships, car hire and fleet management.
Frequently Asked Questions About Spring Car Preparation (FAQ)
In what order should a complete spring car treatment be carried out?
Start with wheels and wheel arches (snow foam, APC, wheel cleaner, deironizer). Continue with the body wash (pre-wash, snow foam, two-bucket method, drying). Then chemical decontamination (tar remover, iron fallout remover) followed by mechanical decontamination (clay bar). Next, apply paint cleaner or light polishing if needed. Finish with protection application (wax, sealant or ceramic coating) and attend to details such as plastic trim, glass and rubber seals. The interior is treated separately.
Why is decontamination necessary after winter before applying wax or sealant?
During winter, road salt, brake dust (iron particles), tar and asphalt accumulate on the paint. These contaminants bond chemically and mechanically to the clear coat and are not removed by regular car washing. If wax or sealant is applied on top of contaminated paint, adhesion is weaker and durability shorter. Decontamination with tar remover, iron fallout remover and clay bar provides a completely clean surface for the protective product to bond to - which can extend durability by 30-50%.
Which paint protection is best after winter – wax, sealant or ceramic?
It depends on desired durability and maintenance level. Natural wax provides the warmest gloss and deepest colour but lasts 4-8 weeks. Synthetic sealant gives a mirror-like finish and lasts 3-6 months. Ceramic coating provides the strongest hydrophobic effect and up to 12 months of durability but requires correct application. Many detailers combine sealant as a base and wax as a topper. Regardless of choice - maintain the protection regularly with quick detailer or spray wax every 4-6 weeks.
Leave a comment