


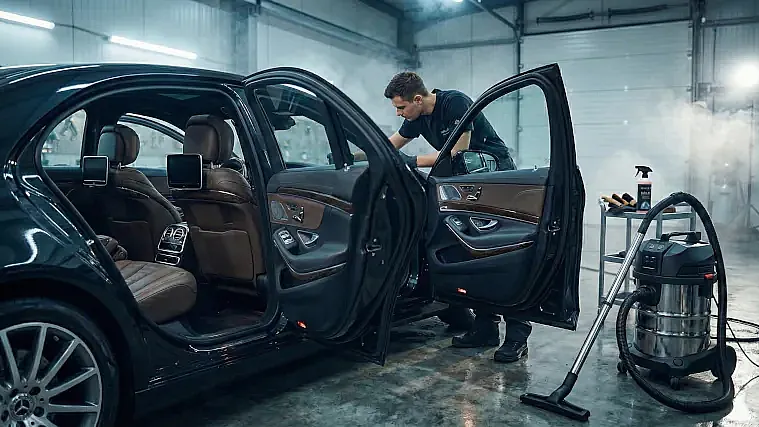
Full Interior Detailing – Deep Cleaning the Entire Car Cabin
The weekly interior routine keeps surfaces presentable, but dust, dirt and debris accumulate in crevices, seams, air vents and under seats. At regular intervals a thorough clean is needed that reaches every surface in the cabin – from the headliner and door panels to footwells and window seals.
This guide takes you through the entire process in four steps: vacuuming, cleaning plastics and details, protecting plastic panels and streak-free glass cleaning.
Essential products and tools
- Vacuum cleaner with crevice tools and soft brush attachment
- Detailing brushes in several sizes
- APC (all-purpose cleaner)
- Interior Quick Detailer
- Trim dressing
- Glass cleaner
- Microfibre cloths – at least 5–6 (separate dry, damp and glass cloths)
- Nitrile gloves (prevent finger oils from transferring to glass and microfibre)
- Metal bristle brush (for carpets and floor mats)
Step 1: Thorough vacuuming – top to bottom
Start by removing all loose items, rubber mats and fabric mats from the car. Vacuuming is done systematically from top to bottom.
Headliner
The headliner collects dust and vapour deposits that are rarely visible but affect air quality. Use a brush attachment with soft, natural bristles – hard nozzles can damage the fabric. Vacuum the entire surface with light, parallel strokes.
Seats
Start with the headrests, continue with the backrest and finish with the seat cushion. Use a crevice tool in seams, between the backrest and seat cushion, and in all gaps. Fold the seats forward and vacuum underneath – this is where grit, coins and debris collect.
Centre console, compartments and details
Use crevice tools to reach the glovebox, cup holders, door pockets and storage compartments. Detailing brushes help loosen dust from air vents, buttons and steering wheel crevices before you vacuum it up.
Floors and carpet
Vacuum all footwells thoroughly. Use a metal bristle brush to loosen deeply embedded grit and sand from the carpet before vacuuming – the brush lifts particles that the vacuum cannot reach on its own. Do not forget the boot.
Step 2: Cleaning plastic panels and details
After vacuuming, all plastic surfaces, buttons, handles and details are cleaned.
Method
- Dilute APC according to the manufacturer's recommendation (typically 1:5 to 1:10 for interior use).
- Spray APC onto the surface with a spray bottle.
- Work the product in with a detailing brush – especially in crevices, seams, buttons and textures.
- Wipe off with a dry microfibre cloth.
- Go over the surface once more with a damp microfibre cloth (sprayed with clean water) to remove all product residue.
Specific surfaces
- Air vents: Spray APC onto the brush (not directly into the vent) and work dust out from the inside. Wipe with a microfibre cloth.
- Buttons and dials: Use the smallest brush size. Work around the edges where dirt collects.
- Steering wheel: The steering wheel is the dirtiest surface in the cabin. Clean with APC and a brush, wipe dry and go over with a damp cloth.
- Door panels: Include door pockets, window controls and the inside of the door handle.
- Pedals and footrest: Often overlooked – scrub with APC and a stiffer brush.
Step 3: Protect the plastic panels
Clean plastic surfaces are susceptible to dust and UV damage. A trim dressing protects against UV, reduces static build-up that attracts dust and gives the surface a fresh appearance.
Dressings are available in three finishes:
- Matte finish: Looks factory-fresh. Neutral, professional appearance.
- Satin finish: Slight sheen without looking heavily polished.
- Gloss finish: High gloss – popular on specific details but can look excessive on large surfaces.
Application: Spray or apply dressing onto a microfibre cloth (never directly onto the surface). Spread evenly and allow the product to dry. Buff off any excess with a clean cloth.
Step 4: Glass cleaning – streak-free technique
Interior glass cleaning is the step most people find difficult – streaks, haze and fingerprints. The right technique and product choice make the difference.
How to do it
- Put on nitrile gloves – finger oils transfer to the microfibre cloth and glass, causing streaks.
- Spray glass cleaner onto a clean microfibre cloth (not directly onto the glass – it drips down onto the plastic panels).
- Wipe the glass with straight strokes from one edge to the other. Work systematically – top to bottom.
- Buff the glass with a second, dry microfibre cloth to remove the last traces of moisture and product.
The windscreen from inside
The windscreen is the most difficult window to clean from the inside. Work from the passenger side if possible – it gives a better angle. Use a glass tool with a handle if you have difficulty reaching the lower section of the windscreen.
Suitable for: Professional detailers, reconditioning technicians, car enthusiasts, car dealers, car hire companies and anyone wanting to carry out a thorough interior deep clean.
Industries: Vehicle care, car reconditioning, detailing studios, car dealerships, car hire, taxi and fleet management.
Frequently Asked Questions About Full Interior Detailing (FAQ)
How often should a full interior detail be carried out?
A thorough interior detail is recommended every 2–3 months for cars used daily. Cars with pets, children or professional use (taxi, car hire) may need it more frequently – once a month. The weekly quick routine (wiping plastics, glass and vacuuming mats) extends the time between deep cleans.
Why should you wipe with a damp microfibre cloth after APC cleaning of plastic panels?
APC residue left on plastic panels can cause discolouration – especially on light-coloured plastics such as grey and beige. The residue also forms a film that reduces adhesion of dressing applied afterwards, resulting in shorter durability and uneven finish. The final wipe with a damp microfibre cloth (sprayed with clean water) removes all residue and provides a completely clean surface for the dressing to bond to.
How do you avoid streaks when cleaning car windows from the inside?
Three factors eliminate streaks: 1) Wear nitrile gloves – finger oils are the most common cause of streaks. 2) Spray glass cleaner onto the microfibre cloth, not directly onto the glass – this prevents product from running down onto the plastic panels and leaving marks. 3) Buff with a second, dry microfibre cloth after cleaning. Use a waffle-weave cloth that has better contact with the glass and leaves fewer fibres.
Leave a comment